

5 Stage Renovation Sequencing Roadmap for New Zealand Homeowners

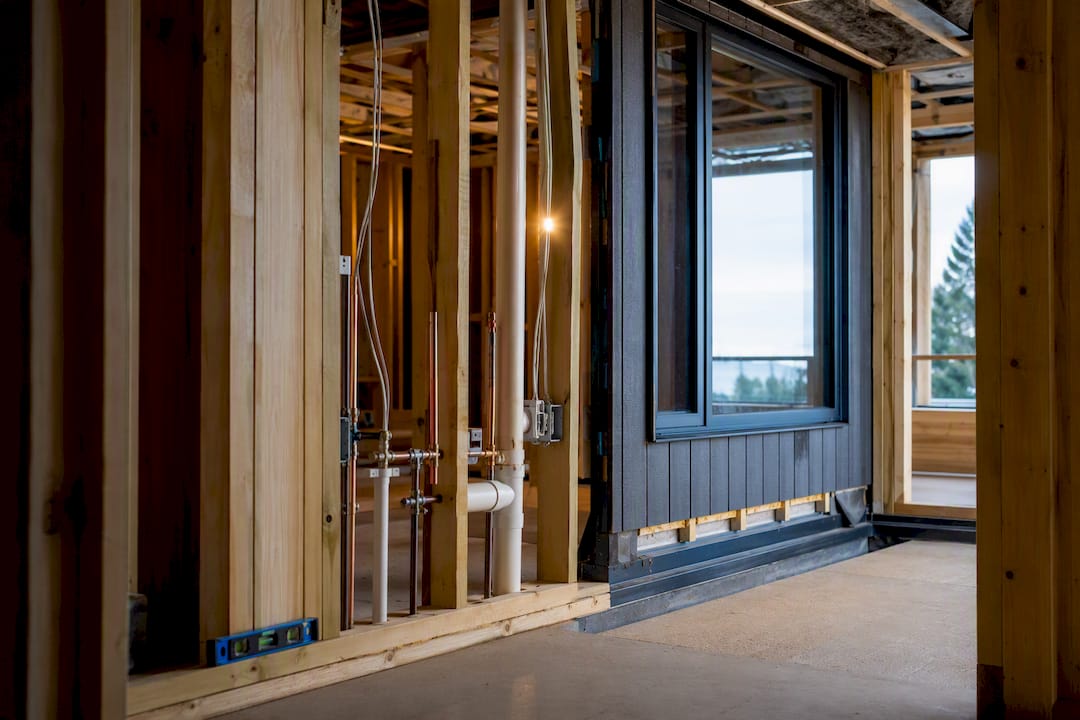
The rule is simple: go top down and outside in. Fix structure and weathertightness first, install services second, then finish with linings and surfaces last. Before you touch a hammer, confirm whether the work needs building consent and lock your wet-area decisions early. Start there, then check Building for consent triggers, or talk to Sortedhomesolutions about coordinating the trades in the right order.
TL;DR:
Confirm wet-area layout and ventilation decisions during design to prevent costly rework caused by incorrect service positions or moisture issues.
Lock in structural, envelope, and service stages sequentially to avoid mistakes that lead to tearing out finished surfaces or redoing membrane work.
Initiate building consent early, as delays beyond 12 months can require reapplication, adding months to the project timeline.
Order long-lead materials like custom joinery and tiles at the design stage to prevent project stalls due to late deliveries; staging deliveries helps manage site logistics.
Always verify final service and drainage locations with photos before tiling begins to avoid expensive rework caused by inaccurate rough-in placements.
Table of Contents
What is the correct renovation sequencing order?
Every renovation, whether it is one bathroom or a whole house, moves through five stages: investigate, design, enable, build, finish. Skip one or run them out of order, and you pay for it later, usually in torn-up tiles or a services rough-in that has to be redone because a wall moved.
Investigate. Before any design decision gets locked in, get eyes on what is actually behind the walls. This means moisture checks, structural observations, and a proper look at drainage falls and existing services. A surveyor or builder walking the site early catches the problems that would otherwise surface halfway through demolition, when they are far more expensive to fix. Demolition and early enabling works also need a hard look at asbestos risk in older homes, something WorkSafe NZ flags as a standard check before you start pulling out linings.
Design. This is where you lock the decisions that are expensive to change later: wet-area locations, rough layouts, and any long-lead items that influence structure or services. Moving a shower drain after slab work is finished costs vastly more than moving it on a floor plan. Nail down your fixture positions, your ventilation strategy, and your finish selections here, even if the actual products arrive months later.
Enable. This is the consent and procurement stage. Apply for building consent once your design is fixed, because a consent must be started within 12 months and finished within two years unless you arrange an extension, according to building.govt.nz’s building process guidance. It also pays to identify which trades require a Licensed Building Practitioner for restricted building work, since that affects who you book and when.
Build. Structure goes first: framing, any structural alterations, load-bearing changes. Then the envelope: roofing, cladding, windows, anything that makes the building weathertight. Only once the building is closed in and dry does the services rough-in happen, plumbing, wiring, ducting, followed by a pre-line inspection before anyone covers the walls. Linings go on after that inspection passes, then finishes: painting, flooring, cabinetry, fixtures.
Finish. Final fit-off, commissioning, snagging, and sign-off. This is also when you should be collecting documentation, which the handover section below covers in more detail.
This order exists for a reason grounded in how trades actually work. NB Architects point out that structure first, envelope second, services third, and linings and finishes last is the sequence that avoids costly rework, and reversing it is one of the most common causes of blown budgets in New Zealand renovations. Tile before the plumber has confirmed rough-in positions, and you might be re-tiling. Paint before the electrician has finished chasing cables, and you are repainting.
A useful way to think about sequencing is as dependency management. Treat the renovation like an assembly line: each trade needs specific conditions in place before they can start, and materials need to be on site exactly when that trade is ready for them. Get this wrong in either direction, and you either have idle tradespeople standing around waiting for a delivery, or a delivery sitting in a driveway for three weeks with nowhere to go.
Key decisions by stage, at a glance:
Investigate: confirm structural condition, moisture levels, and existing service locations before committing to a design.
Design: fix wet-area layouts, ventilation paths, and any structural changes; start selecting long-lead items.
Enable: lodge consent applications, confirm which trades need LBP sign-off, and order materials with long lead times.
Build: structure, then envelope, then services rough-in, then a pre-line inspection, then linings and finishes.
Finish: fit-off, commissioning, snagging, and document collection.
If you need to live in the house during the renovation, this sequence can flex without breaking. You can stage a whole-house renovation room by room, keeping the kitchen functional while the bathroom is gutted, for instance. What cannot flex is the order within each room: you still need structure and weathertightness sorted before services, and services before linings, no matter how you stagger the rooms against each other.
What is the trade order for a bathroom renovation?
Bathrooms compress the entire renovation sequence into a small, moisture-sensitive space, which is exactly why they generate more sequencing errors than any other room. The trade order runs like this:
Demolition. Strip out old fixtures, tiles, and linings back to the structure.
Investigation. Check the subfloor, wall framing, and existing waste and supply lines for damage or movement.
Plumbing rough-in. Position new waste and supply lines to match the fixed layout from your design stage.
Waterproofing and membrane installation. Apply the membrane system to floors and walls in the wet area, following manufacturer specifications for coverage and upturns.
Pre-tile inspection. A building inspector or your project manager checks the membrane before anything covers it, because this is the point of no return before tiling begins.
Tiling. Lay floor and wall tiles once the membrane has passed inspection and cured.
Waterproof verification. Confirm falls to waste and any final sign-off requirements tied to the consent.
Cabinetry and fixtures. Install vanities, toilets, and shower screens once tiling is finished and surfaces are protected.
Fit-off and commissioning. Connect taps, test water pressure, check drainage, and confirm everything operates as designed.
This order is not arbitrary. Many like-for-like bathroom renovations are exempt from consent under Schedule 1 of the Building Act, but installing a tiled wet-area shower generally requires consent because it involves membrane work classed as critical non-sanitary building work, according to Auckland Council’s guidance on kitchen, bathroom and home renovations. If your renovation changes the shower footprint, adds a new wet-area shower where there wasn’t one, or alters drainage, assume consent applies until a council officer tells you otherwise.
Ventilation deserves its own mention here, because it is one of the most frequently underestimated parts of bathroom sequencing. The Building Code’s E3 internal moisture provisions set requirements for moisture control that directly affect when extraction and floor falls need to be fixed in your programme. Passive ventilation through a window is often not enough for a modern, sealed bathroom, so mechanical extraction needs to be planned at design stage, not bolted on afterwards when someone notices condensation on the ceiling.
Pro Tip: Get your plumber to mark and photograph the final rough-in positions before the tiler starts. This single step prevents the single most expensive bathroom mistake: tiling around a drain or supply line that turns out to be in the wrong spot, forcing you to smash out fresh tile to move it.
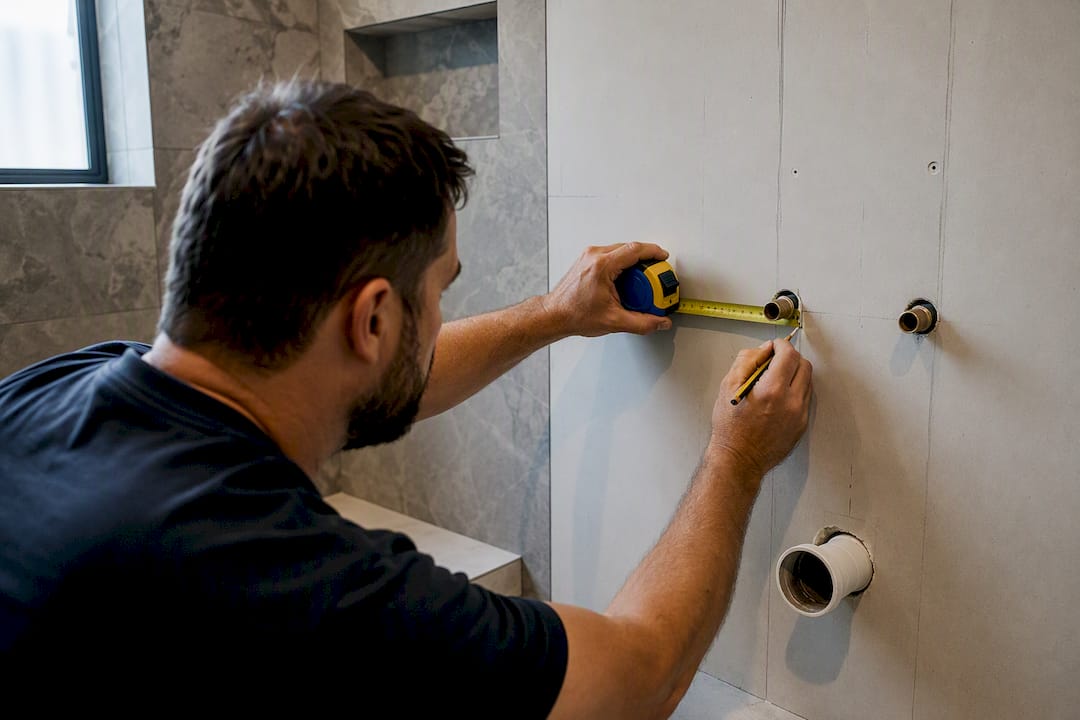
For a room-by-room breakdown of how these trades stack up against a real schedule, Our website has published a bathroom renovation timeline that walks through each week, and a deeper look at bathroom plumbing layout decisions that shape everything downstream of the rough-in.
How long does each stage of a renovation actually take?
Timeframes vary with scope, but a few benchmarks help you set realistic expectations before you sign anything.
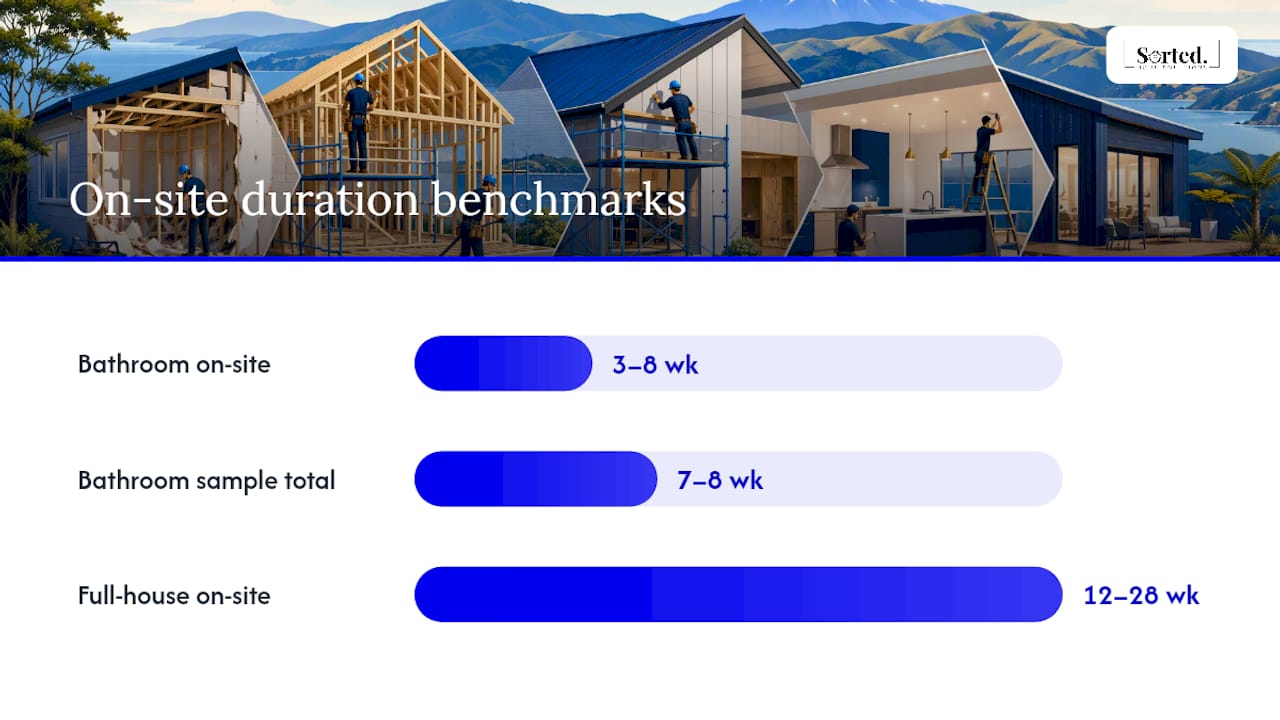
A standalone bathroom renovation typically runs 3 to 8 weeks on site, depending on whether you are doing a straightforward refit or moving plumbing and walls. A full-house renovation usually runs 12 to 28 weeks on site, and the total project window, including design, consent processing, and procurement, often stretches to 3 to 18 months depending on complexity and how quickly consent is issued. On-site construction for a full renovation commonly sits in that 12 to 28 week band, with total project timelines of 9 to 18 months once you factor in design and consenting, according to Add Value Renovations’ Auckland renovation timeline breakdown.
Delays cluster around a handful of predictable causes:
Consent processing takes longer than expected, particularly for anything involving structural changes or wet-area work.
Long-lead items like custom joinery or imported tiles arrive later than the supplier’s original quote.
Inspections get missed or booked late, holding up the next trade in the sequence.
Site discoveries during demolition, like unexpected moisture damage or non-compliant old wiring, force a design rethink mid-build.
Build contingency into your programme at these exact points rather than spreading a vague buffer across the whole project. Consumer NZ’s guidance on the building process recommends getting your construction plan in writing with clear start and finish dates in the contract, and treating variations as an expected part of the process rather than a surprise.
Sample programme A: complete bathroom. Week 1: demolition and investigation. Week 2: plumbing and electrical rough-in. Week 3: waterproofing and pre-tile inspection. Weeks 4 to 5: tiling and curing. Week 6: cabinetry, fixtures, and fit-off. Add one to two weeks buffer for inspection scheduling.
Sample programme B: staged whole-house renovation. Months 1 to 2: design and consent lodgement. Months 3 to 4: structural work and envelope on the first staged area. Months 5 to 6: services rough-in and pre-line inspection. Months 7 to 9: linings, finishes, and handover of the first stage, before moving to the next. Staging this way lets you keep a kitchen or living area functional while the rest of the house is under construction, which usually adds a modest cost premium for temporary service reroutes but preserves liveability.
For a fuller breakdown with checklists you can adapt to your own project, we have a more detailed home renovation timeline covering both bathroom and whole-house scopes.
Which renovation jobs actually need building consent?
Consent status changes what you can sequence when, so it pays to work this out before you book a single trade.
Building consent is generally required whenever work affects structure, weathertightness, or the building’s compliance with the Building Code, while genuinely like-for-like replacements are often exempt under Schedule 1. The clearest example is bathrooms: swapping a vanity or replacing tiles on a like-for-like basis is usually exempt, but installing a new tiled wet-area shower typically requires consent because it involves membrane work, which Auckland Council classes as critical non-sanitary building work. General building projects follow a consistent staged path, planning and consent, site setup and foundations, framing, roofing and cladding, services rough-in, lining, finishes, and sign-off, as set out by building.govt.nz.
Timing rules matter more than most homeowners expect. A consent must be actioned within 12 months of issue and completed within two years, unless you apply for an extension. Miss that window, and you may need to reapply, which resets your programme by weeks or months.
Inspections you should be booking into your programme from the outset:
Siting or pre-pour inspection, before foundations are poured.
Pre-line or frame inspection, before any linings go up over structure or services.
Waterproofing or pre-tile inspection, specifically for wet areas with membrane systems.
Final inspection, once all work is complete and ready for code compliance certification.
Restricted building work also requires a Licensed Building Practitioner to carry out or supervise the work, according to building.govt.nz’s LBP guidance, so confirm early which parts of your job fall into that category and book the right people accordingly.
What sequencing mistakes cost homeowners the most?
The single costliest error is finishing before services are locked in. Tiling, painting, or laying flooring before plumbing and electrical rough-in is confirmed almost guarantees you will be undoing finished work to fix a service that was in the wrong place. This is the mistake NB Architects point to as the most common cause of rework in New Zealand renovations.
Other frequent errors follow a similar pattern of doing something too early or checking something too late:
Skipping or delaying the pre-tile waterproofing inspection, then discovering a membrane fault after tiles are already down.
Failing to order long-lead joinery or custom fixtures early enough, leaving trades idle while they wait for materials.
Treating ventilation as an afterthought instead of a design-stage decision, leading to condensation problems that require retrofitting extraction later.
Ignoring floor falls to waste until tiling starts, when it should be confirmed at the plumbing rough-in stage.
A short mitigation checklist reduces most of this risk: lock wet-area layouts and ventilation strategy at design stage, insist on the pre-line and pre-tile inspections as genuine hold points rather than formalities, and manage variations through a written change process rather than a verbal agreement on site.
Pro Tip: Floor falls and ventilation are cheap to fix on paper and expensive to fix in tile. Confirm both before the plumber leaves the rough-in stage, not after the tiler has started.
How do you time material orders so trades aren’t waiting around?
Procurement timing is where a lot of programmes quietly fall apart. Long-lead items are the usual culprit:
Custom joinery and cabinetry, often 6 to 10 weeks lead time depending on the supplier and finish.
Stone or engineered benchtops, typically 3 to 6 weeks once templated, which itself can only happen after cabinetry is installed.
Custom or imported tiles, which can run 4 to 12 weeks depending on origin and stock availability.
Shower screens and glass, usually 2 to 4 weeks, but only after final wall measurements are taken post-tiling.
The ordering timetable that avoids idle trades looks roughly like this: lock selections at design stage, place orders for joinery and tiles as soon as consent is lodged (not once it is granted), and hold glass and screen orders until final measurements are possible on site. Material and trade dependencies are one of the most underestimated parts of any build schedule, something The Build’s guide to scheduling dependencies explains well in the context of managing multiple trades against material delivery windows.
Storage matters too. Staged delivery, rather than having everything arrive at once, protects both your site and your programme, and negotiating deposit or payment terms tied to delivery milestones rather than order date protects your cash flow if a supplier slips.
What should you check off at handover?
Handover is where a lot of renovations quietly lose their paper trail, and that catches up with homeowners years later at resale or when something needs fixing.
At minimum, expect to receive consent sign-off documentation, records of every inspection passed during the build, product warranties, datasheets for anything installed (tiles, waterproofing systems, appliances), and as-built notes showing what actually got built versus what was originally designed.
Updated drawings and service location plans matter more than most homeowners realise, particularly if the renovation was staged. A plumber working on your kitchen in three years’ time needs to know exactly where pipes run behind the wall you renovated last year, not guess based on where they were originally.
A short completion checklist:
Confirm code compliance certificate has been issued (not just applied for).
Collect all warranties and product datasheets in one folder, physical or digital.
Request updated as-built drawings if any service positions changed during the build.
Photograph key service locations behind walls before they’re permanently covered, for future reference.
Where sequencing can flex, and where it can’t
There’s a difference between a sequencing rule that’s genuinely rigid and one that’s just conventional. Weathertightness and wet-area membranes sit firmly in the rigid camp. Get the envelope closed in before services go in, and get waterproofing inspected before tiling covers it. Full stop. These are the two points in a renovation where a shortcut doesn’t save time, it just moves the cost further down the line and multiplies it.
Where sequencing genuinely can flex is around staging and liveability. If you need a functioning kitchen while the bathroom is gutted, or a working bathroom while the kitchen is torn out, you can stagger which room goes first without breaking the underlying rule within each room. This is a real trade-off, not a compromise on quality, and it’s one of the more useful pieces of practical knowledge that separates a programme built by someone who has actually run renovations from one built purely on a generic template.
What tends to get underestimated is how much a single point of contact changes the sequencing risk profile. Most rework doesn’t happen because a tradesperson did bad work, it happens because two trades weren’t talking to each other about what the other needed before they started. The coordination of trades, sequencing and consent timing can be treated as one continuous programme rather than a series of separate bookings, which is closer to how the risk actually needs to be managed on site.
— Rudi
How Sorted Home Solutions manages your renovation sequence
Getting the sequence right on paper is one thing. Coordinating a plumber, an electrician, a tiler, and a council inspector so nobody is waiting on anybody else is where most DIY-managed renovations lose weeks. Renovations can be run as one managed programme instead of a string of separate trade bookings, so the sequencing decisions above, structure, envelope, services, then finishes, get handled by a single point of contact rather than left to you to referee between trades.

That single point of contact covers full project management, consent support, and trade coordination across kitchens, bathrooms, and whole-house renovations, so the pre-line and pre-tile inspections happen when they should rather than when someone remembers to book them. If you’re planning a bathroom and want a fixed scope before you commit, The bathroom renovation service page sets out package options, and the full home renovation page covers what a managed whole-house programme looks like end to end. Whichever way you’re leaning, One way to find out what your project actually needs is to get in touch for a quote and talk through your sequence before you book a single trade.
Where to check the rules yourself
For anything time-sensitive or legally binding, go to the source rather than a secondhand summary.
Building for the official sequence and consent timing rules.
Building for wet-area ventilation and moisture requirements.
Auckland Council’s bathroom renovation guidance for consent clarifications on wet-area work.
Sortedhomesolutions’ bathroom waterproofing requirements post for a deeper look at pre-tile checks.
Sources
FAQ
What is the correct order of renovation?
Structure first, then the weathertight envelope, then services rough-in, then linings and finishes last. Reversing this order is the most common cause of rework in New Zealand renovations.
What does a $10,000 bathroom remodel look like?
At that budget, expect a like-for-like refresh rather than a full reconfiguration: new fixtures, tiling over existing waterproofing where it still passes inspection, and minimal plumbing changes. Moving the shower or adding a new wet area usually pushes costs and consent requirements well beyond that figure.
What is the correct order to renovate a house?
Investigate the structure and services first, lock your design decisions, secure building consent, then build in the order of structure, envelope, services, and finally linings and finishes. Staging by room is fine, but each room still follows that same internal order.
What are the biggest home renovation mistakes?
Finishing surfaces before services are confirmed, skipping the pre-tile waterproofing inspection, and ordering long-lead materials too late all rank among the costliest sequencing errors homeowners make.
Does a new bathroom shower always need building consent?
Not always. Like-for-like replacements are often exempt, but installing a new tiled wet-area shower generally requires consent because it involves membrane installation classed as critical building work.
Recommended
Comments