

Bathroom plumbing layout: NZ renovation-ready guide

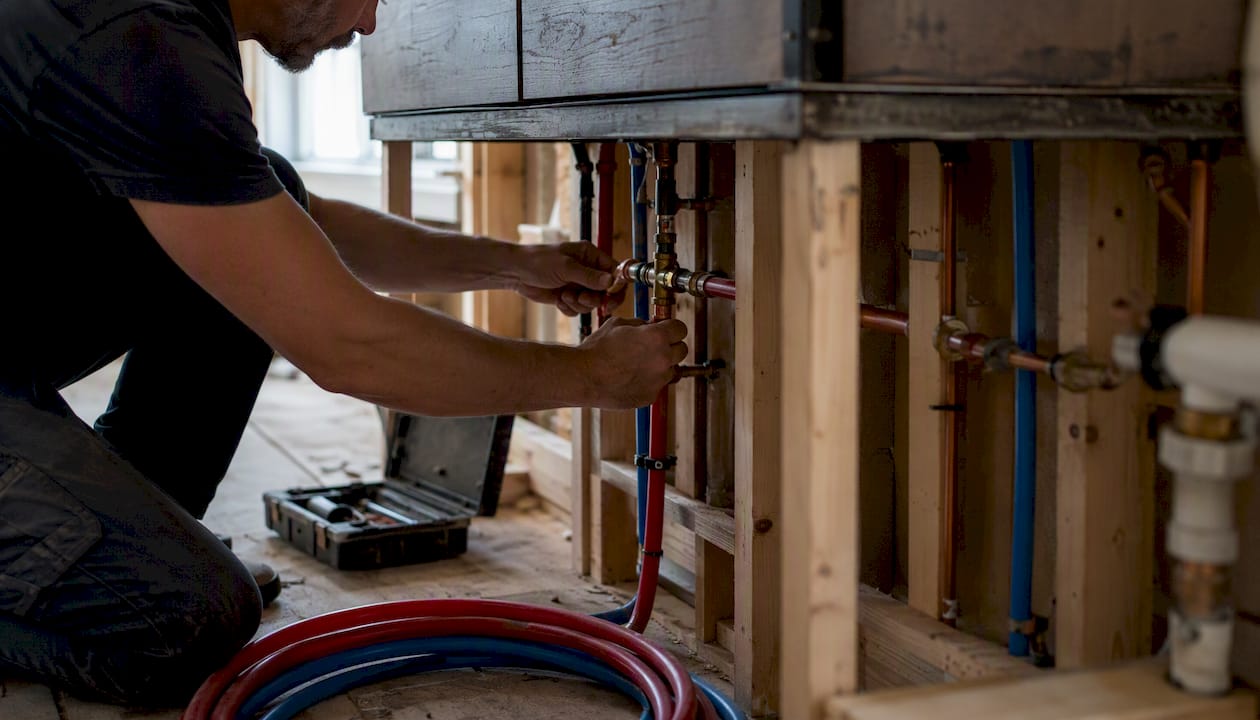
The most reliable approach to a bathroom plumbing layout is to plan around your existing soil and waste pipe positions, confirm fixture setouts before rough-in, and lock everything in place before waterproofing begins. This applies whether you are renovating a single bathroom in an Auckland villa or fitting out a new ensuite in a multi-storey home. The governing standards are Building Code Clause G13 for foul water disposal and AS/NZS 3500.2 for pipe sizing and venting. Sortedhomesolutions coordinates all of this for Auckland homeowners under one fixed-fee contract.
Before you speak to a plumber, run through these first steps:
Locate your existing soil stack, floor waste positions and hot water cylinder or heat pump unit.
Confirm the setout dimensions for your toilet pan centre, shower waste, basin trap and vanity outlet height.
Check that your chosen tapware and fixtures comply with the lead-content transition requirements under G12 water supplies (transition period ending 1 May 2026).
Book a pre-start plumbing check with a licensed plumber before committing to any floor or wall positions.
Key takeaways
A compliant, cost-controlled bathroom plumbing layout depends on locking fixture positions before rough-in, following AS/NZS 3500.2 sizing rules and using a licensed plumber for all sanitary plumbing work.
Point | Details |
Plan around existing drain positions | Keeping fixtures in place reduces pipe runs, cost and consent complexity. |
Lock setouts before rough-in | Confirm toilet, shower, basin and vanity dimensions before framing is fixed. |
Follow AS/NZS 3500.2 sizing rules | Never reduce pipe diameter in the direction of flow; maintain 1:60 minimum gradient. |
Hire a licensed professional | Sanitary plumbing and drainlaying must be carried out by an authorised plumber or drainlayer. |
Sortedhomesolutions manages the full process | Fixed-fee contracts, licensed trades and consent handling for Auckland bathroom renovations. |
Table of Contents
When should you hire a licensed plumber or a full-service renovator?
How do water-efficient fixtures fit into your plumbing design?
How do heating elements integrate with your bathroom plumbing layout?
What on-site experience actually teaches you about plumbing layouts
Sortedhomesolutions handles your bathroom plumbing from plan to fit-off
What does a bathroom plumbing layout actually include?
A bathroom plumbing design covers three interconnected systems: water supply, waste drainage and venting. Understanding each one helps you read a plan, brief a plumber accurately and avoid costly surprises during rough-in.
Water supply lines
Hot and cold supply lines run from your main isolation valve or hot water unit to each fixture. In New Zealand homes, copper remains common in older builds, while polybutylene (Hep2O) and cross-linked polyethylene (PEX) are widely used in newer construction for their flexibility and corrosion resistance. Every fixture branch needs its own isolation valve so you can shut off a single tap without cutting water to the whole house.
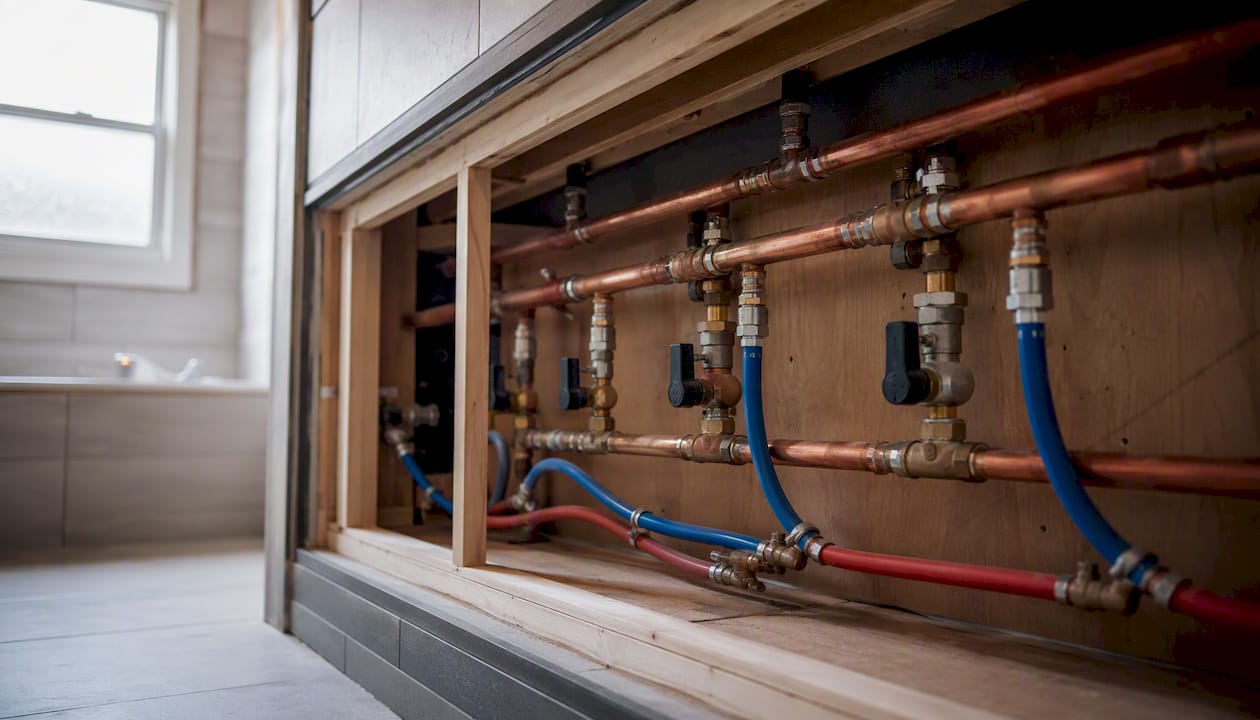
Shower mixer height in NZ practice is commonly around 900 to 1000 mm from finished floor level for a wall-mounted mixer, but this varies by tapware specification. Confirm the exact height with your tapware supplier before rough-in, because moving a supply stub-out after tiling is expensive.
Waste pipes, traps and floor wastes
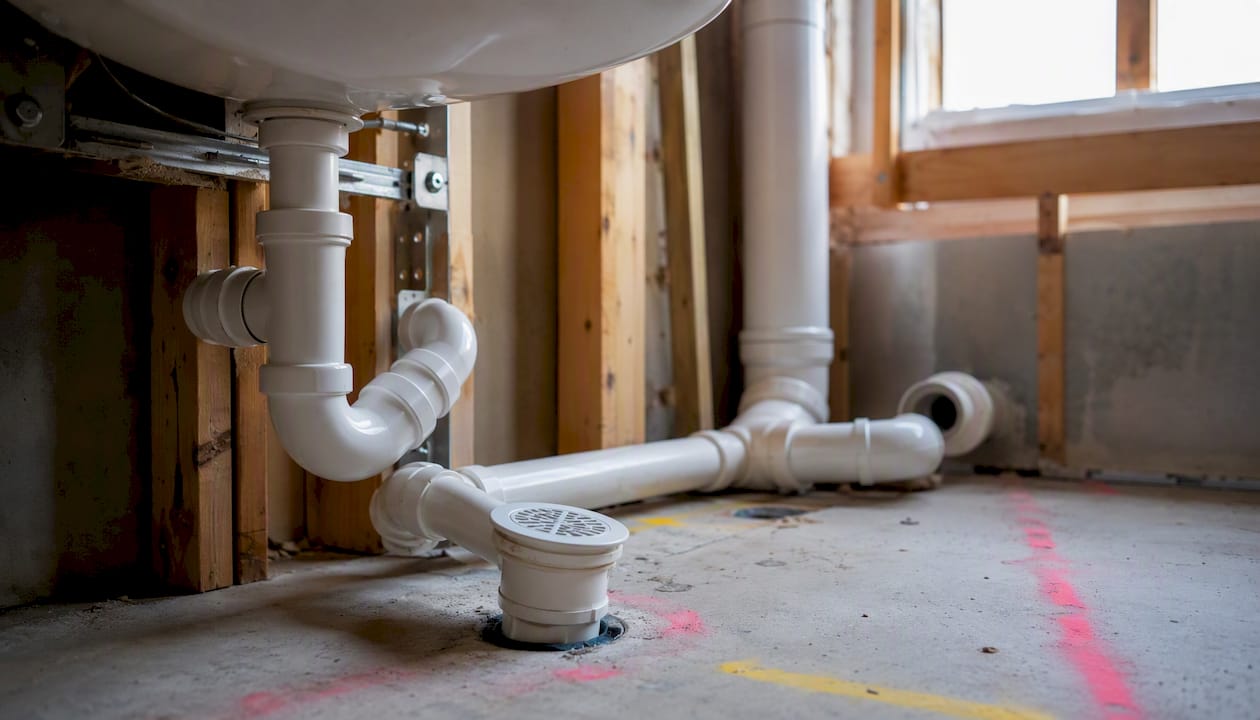
Every fixture discharges through a trap that holds a water seal to block sewer gases. Basins and baths use P-traps or S-traps; showers use floor wastes with integral traps. Toilets connect directly to the soil stack via a pan connector. Discharge unit (DU) values in AS/NZS 3500.2 determine the minimum pipe diameter for each fixture and for combined runs. G13/AS3 references AS/NZS 3500.2 as the accepted design solution for sanitary plumbing and drainage, including PVC-U pipe options.
Venting
Vents prevent siphoning of trap seals by equalising air pressure in the waste system. Each fixture vent connects back to the main vent stack, which terminates above the roofline. G13/AS2 sets the ventilation, gradient and installation requirements for below-ground non-pressure foul water drains up to 150 mm diameter.
Access points and materials
Rodding eyes and access panels must be positioned so a drain can be cleared without demolishing tiling or cabinetry. Plan at least one access panel behind the shower valve wall and one near the soil stack connection. For materials, note that MBIE has announced changes limiting lead content in copper alloy plumbing products, with the transition period ending 1 May 2026. Verify that any tapware or fittings you purchase carry supplier confirmation of compliance.
Component | Typical material (NZ) | Key standard |
Hot/cold supply lines | Copper, PEX, polybutylene | G12/AS1, AS/NZS 3500.2 |
Waste and soil pipes | PVC-U, cast iron (older builds) | G13/AS3, AS/NZS 3500.2 |
Traps | PVC-U, chrome brass | AS/NZS 3500.2 |
Vent pipes | PVC-U | G13/AS2, G13/AS3 |
Isolation valves | Dezincification-resistant (DR) brass | G12/AS1 |
Which bathroom layout type suits your space?
Choosing the right layout pattern before you start a plumbing rough-in in the bathroom can save thousands in pipe relocation costs. The five patterns below cover most NZ residential situations.
Linear (wet wall) layout
All fixtures line up along a single wet wall, sharing one soil stack and one vent run. This is the most cost-effective pattern for renovations because supply and waste runs are short and access is concentrated.
Pros: Lowest plumbing cost, simplest venting, easiest rodding access.
Cons: Limits design flexibility; long narrow bathrooms suit it best.
Corner layout
The toilet and shower occupy adjacent corners, with the vanity on a third wall. Waste runs converge at a central floor waste or connect to a shared stack in the corner.
Pros: Works well in square rooms; separates wet and dry zones naturally.
Cons: Two separate waste runs increase pipe length and the number of bends.
Split layout
Wet areas (shower, bath) sit on one side of the room; the toilet and vanity on the other. This often requires a second vent connection or an air admittance valve where permitted.
Pros: Good for larger bathrooms; separates functions clearly.
Cons: Higher plumbing cost; more complex venting; subfloor access is critical.
Compact (ensuite) layout
Fixtures are grouped tightly, often in a 1500 mm × 1800 mm footprint. Every millimetre of setout matters. The toilet pan centre, shower waste and basin trap must be confirmed before any framing is fixed.
Pros: Efficient use of space; short pipe runs keep costs down.
Cons: No room for error in setouts; access panels are harder to fit.
Stacked bathrooms (multi-storey)
In two-storey homes, aligning bathrooms directly above each other shares one soil stack between floors. This is the single biggest cost-saving decision in a multi-storey bathroom plumbing plan.
Pros: One stack serves both floors; reduces pipe runs and consent complexity.
Cons: Layout on both floors is constrained by the shared stack position.
Pro Tip: Before committing to any layout change, check whether your subfloor gives enough depth for the required pipe fall. A 100 mm PVC-U waste line needs a minimum 1:60 gradient, which means 17 mm of fall per metre of run. In a 3-metre run, that is 50 mm of clearance below the trap outlet — often tight in a suspended timber floor.
What are the rough-in measurements and pipe sizing rules?
Follow AS/NZS 3500.2 minimum fixture discharge diameters and never reduce pipe size in the direction of flow. These two rules prevent most sizing errors on site.
Minimum discharge pipe diameters
These figures are drawn from AS/NZS 3500.2 discharge unit tables, referenced through G13/AS3.
Gradient requirements
In slab construction, gradients must be set before the pour. In timber floors, the fall is achieved by packing or notching joists, which requires a structural check if notching is significant.
The 135° rule explained
When a branch drain joins a main drain, the junction should be angled at 135° (a 45° branch, measured from the direction of flow). This means the branch enters the main pipe in the direction of flow rather than against it. A 90° tee junction creates turbulence, increases blockage risk and can cause back-pressure in the trap. Most NZ plumbers use 45° wye fittings or swept tees to achieve this. The rule applies equally to horizontal-to-vertical transitions: use a long-radius bend rather than a sharp 90° elbow.
Common NZ rough-in setout measurements
Toilet pan centre to back wall: 180–200 mm from finished wall face (confirm with pan connector specification).
Toilet pan centre to side wall: minimum 400 mm clear to any obstruction.
Basin trap centre height: 300–350 mm above finished floor level for a standard vanity.
Shower waste centre: set to the lowest point of the shower floor fall, typically centred or offset to the rear.
Shower mixer height (NZ practice): 900–1000 mm above finished floor level for wall-mounted mixers.
Vanity hot and cold stub-outs: 450–500 mm above finished floor level, spaced 150 mm apart on centre.
Bath waste and overflow: confirm with bath specification; overflow height determines the bath rim height.
Rough-in is the make-or-break stage of any bathroom renovation. A pre-start plumbing check frequently uncovers hidden pipe corrosion, inadequate fall or access problems that change project scope earlier rather than mid-contract — saving significant rework costs.
How do you plan a bathroom plumbing layout step by step?
A clear sequence prevents the most common cause of cost blowouts: late changes after rough-in has started. Renovation planning best practice confirms that locking products and setouts before rough-in is the single most effective way to avoid rework.
Map existing services. Mark the soil stack location, floor waste positions, hot water unit, isolation valves and vent terminations on a scaled floor plan. Note pipe materials and approximate ages.
Confirm fixture selections. Choose your toilet suite, shower base or tray, bath, vanity and tapware before any rough-in dimensions are set. Setouts depend on the exact product specifications.
Lock the layout. Decide which fixtures stay in place and which move. Every fixture that moves adds cost. Get a dimensioned setout drawing from your plumber before framing or waterproofing begins.
Book a pre-start plumbing check. A licensed plumber inspects existing pipes, confirms fall, checks for corrosion and identifies any access issues. This is the point where scope surprises are cheapest to resolve.
Rough-in stage. Supply lines, waste pipes, vents and floor wastes are installed and positioned. This typically takes one to two days for a standard bathroom.
Pressure test. Supply lines are pressure-tested before walls are closed. Waste lines are tested for flow and watertightness.
Waterproofing and tiling. Waterproofing goes on after rough-in is signed off. Never tile before the plumber has confirmed all setouts are correct.
Fit-off. Fixtures, tapware and accessories are installed after tiling is complete and grout has cured.
For budget planning, like-for-like fixture swaps cost significantly less than full relayouts. Moving a toilet to a new wall, for example, requires new soil pipe runs, possible stack modifications and additional venting. Check the Auckland bathroom renovation cost guide for current price benchmarks before finalising your scope.
What NZ compliance rules apply to bathroom plumbing?
Building Code Clause G13 requires the safe disposal of foul water to prevent illness and loss of amenity. Every bathroom plumbing system in New Zealand must comply with G13 and its accepted solutions.
The three accepted solutions under G13 are:
Verification methods G13/VM1 through VM4 provide testing pathways for designs that fall outside the accepted solutions.
Practical compliance checklist:
Fixture discharge pipe diameters meet AS/NZS 3500.2 minimums.
Waste gradients achieve at least 1:60 fall throughout.
Every fixture has a functioning trap with the correct water seal depth.
Vent pipes terminate above the roofline and are correctly sized.
Rodding access is provided at each change of direction.
Watertightness testing is completed before waterproofing is applied.
All tapware and fittings comply with the lead-content limits under G12/AS1 (transition ending 1 May 2026).
Who must carry out the work?
Regulatory guidance confirms that most sanitary plumbing, drainlaying and water heater work must be carried out by authorised professionals. Even repair and maintenance of sanitary plumbing requires an authorised plumber or drainlayer. Building consent is required for new drainage connections, new soil stacks and significant layout changes. A licensed plumber or drainlayer must sign off the work and provide a certificate of compliance.
What are the most common bathroom plumbing layout mistakes?
Most renovation cost blowouts trace back to a small set of predictable errors. Catching them before rough-in starts is far cheaper than fixing them after tiling.
Common mistakes:
Moving the toilet without checking fall. A toilet relocated more than 1–1.5 metres from the existing stack often cannot achieve the required 1:60 gradient within the available subfloor depth.
Too many bends in waste runs. Each 90° bend adds resistance and blockage risk. Use 45° swept bends and minimise direction changes.
No rodding access. Waste pipes buried behind tiling with no access panel cannot be cleared without demolition.
Wrong trap depths. Traps set too shallow lose their water seal under normal use; traps set too deep are hard to clear.
Incompatible tapware and hot water limits. Some thermostatic mixers require a minimum flow rate or pressure that older hot water units cannot deliver. Confirm compatibility before purchase.
Ignoring existing pipe condition. Older homes, particularly those built in the 1950s and 1960s, often have mixed-material pipework or corroded cast iron that must be replaced during renovation.
How to detect problems early:
During the pre-start check, ask your plumber to run water through existing waste lines and observe the flow rate and drain time.
Use a spirit level or laser level to confirm actual fall under the floor before committing to drain positions.
Check that existing vent pipes are clear and terminate correctly above the roofline.
Pro Tip: Before fixing any drain position, pour a bucket of water into the existing floor waste and time how long it takes to clear. A slow drain at this stage almost always means inadequate fall or a partial blockage that will worsen after new fixtures are connected.
Practical templates and rough-in diagrams for NZ bathrooms
A dimensioned rough-in diagram handed to your plumber before work starts eliminates most on-site ambiguity. The following assets cover the most common NZ bathroom configurations.
Useful documents to prepare or download:
Standard bathroom rough-in PDF: Shows toilet pan centre, basin trap, shower waste, bath waste and supply stub-out positions with dimensions from finished walls.
Compact ensuite diagram: 1500 mm × 1800 mm footprint with toilet, shower and basin setouts annotated.
Stacked bathrooms diagram: Two-floor layout showing shared soil stack position and individual fixture connections on each level.
One-page site checklist: Covers fixture setouts, pipe diameters, gradient confirmation, access panel locations, vent terminations and sign-off points.
How to annotate your own floor plan
Measure from finished wall faces, not framing. Mark the centre of each waste outlet and supply stub-out, not the edge of the fixture. Note the floor construction type (timber suspended or concrete slab) because this affects how gradient is achieved and where pipes can run.
Fixture | Measurement to record | Notes |
Toilet | Pan centre to back wall; pan centre to side wall | Confirm with pan connector spec |
Basin | Trap centre height above FFL; supply stub-out spacing | 150 mm centres, hot left |
Shower | Waste centre position; mixer height above FFL | Confirm with shower base spec |
Bath | Waste and overflow heights; tap hole positions | Confirm with bath specification |
Vanity | Cabinet width and depth; plumbing access panel size | Lock before rough-in |
For timber floor situations, note the joist direction and depth so your plumber can confirm whether pipes can run between joists or must cross them. Slab situations require all waste positions to be confirmed before the pour, with no adjustment possible afterwards.
When should you hire a licensed plumber or a full-service renovator?
Some bathroom plumbing work is straightforward; other work is legally required to be done by an authorised professional. Knowing the boundary saves time and avoids compliance problems.
You must hire a licensed plumber or drainlayer when:
Moving or extending a soil stack.
Installing new below-ground drains or connecting to the public sewer.
Installing or relocating a water heater.
Any work requiring building consent.
Installing on-site foul water disposal systems (septic, treatment units).
Any gas work associated with instantaneous hot water units.
For a clear breakdown of when to DIY and when to hire, the DIY vs professional renovation guide covers the legal and practical boundaries for Auckland homeowners.
Who does what
An authorised plumber handles sanitary plumbing above ground: supply lines, waste pipes, traps, vents and fixture connections. An authorised drainlayer handles below-ground drainage from the building to the public sewer or on-site disposal system. A full renovation project manager coordinates both trades, manages building consent, sequences the work and provides a single point of contact for the homeowner.
Questions to ask before hiring
Are you a licensed plumber or drainlayer registered with the Plumbers, Gasfitters and Drainlayers Board?
Do you carry current public liability and professional indemnity insurance?
Who manages the building consent application and inspection bookings?
Can you provide a fixed-price quote for rough-in and fit-off separately?
What is your process if hidden pipe damage is found during strip-out?
Who coordinates the sequencing between plumbing, waterproofing and tiling?
Do you provide a certificate of compliance on completion?
How do water-efficient fixtures fit into your plumbing design?
Water-efficient fixtures reduce running costs without requiring changes to your pipe layout, provided you confirm flow rate and pressure compatibility during the planning stage.
The Water Efficiency Labelling and Standards (WELS) scheme rates fixtures from one to six stars. A six-star showerhead uses around 6 litres per minute, compared to 15–20 litres per minute for an unrated fixture. This difference affects your hot water unit sizing: a high-efficiency showerhead may allow you to specify a smaller continuous flow unit or reduce heat pump capacity.
Dual-flush toilets are standard in most NZ renovations and require no special plumbing provision beyond the standard 100 mm soil connection. Mixer taps with aerators reduce flow without affecting perceived pressure. Thermostatic shower valves maintain a set temperature, reducing the time spent adjusting water temperature and cutting water waste at the start of each shower.
From a layout perspective, grouping water-efficient fixtures on a shared hot water loop reduces the dead-leg length (the pipe run between the hot water unit and the fixture). A shorter dead-leg means less water wasted waiting for hot water to arrive. In larger bathrooms, a recirculating hot water loop or a point-of-use booster can eliminate this wait entirely. For guidance on energy efficiency improvements that complement water-efficient plumbing, including heat pump hot water systems, that resource covers current NZ options.
How do heating elements integrate with your bathroom plumbing layout?
Underfloor heating and heated towel rails each interact with the plumbing layout in different ways, and both need to be planned before rough-in.
Underfloor heating in bathrooms is almost always electric (resistive mat or cable) rather than hydronic in NZ residential construction, because the floor area is small and a dedicated hydronic circuit is rarely cost-effective at that scale. Electric underfloor heating sits between the waterproofing membrane and the tile adhesive, so it must be specified before tiling begins. The plumbing implication is straightforward: floor waste and shower waste positions must be finalised before the heating mat is laid, because cutting through a mat after installation voids the warranty and creates a fault risk.
Heated towel rails in NZ are predominantly electric, either hardwired or plugged into a nearby GPO. Hydronic towel rails connected to the central heating circuit are less common but do appear in high-specification renovations. For a hydronic rail, the supply and return connections must be included in the rough-in stage, with isolation valves on both legs. Electric rails require only an electrical rough-in (a dedicated circuit or switched GPO), which is coordinated with the electrician, not the plumber.
The sequencing rule for both: confirm the type and position of heating elements before waterproofing. A heated towel rail fixed to a tiled wall needs a backing block in the framing, and a hydronic rail needs pipe stub-outs behind the wall. Neither can be added easily after tiles are on.
Accessibility and universal design in bathroom plumbing
Accessible bathroom design changes several standard rough-in dimensions, and these changes must be locked in before framing, not retrofitted after tiling.
Key plumbing setout changes for accessibility:
Toilet height: A comfort-height pan (430–480 mm rim height) requires a different pan connector angle than a standard pan. Confirm the connector specification before setting the floor waste position.
Roll-in shower: A curbless (zero-threshold) shower requires the floor waste to be set lower and the floor fall to be achieved across a larger area, typically 1:80 gradient across the full shower floor. This affects the subfloor depth required.
Grab rail backing: Grab rails must be fixed to backing blocks in the framing. Mark backing block positions on the rough-in plan so they are installed before waterproofing.
Vanity height: A wall-hung vanity at 800–850 mm (versus the standard 860–900 mm) allows wheelchair access underneath. The waste trap must be a compact bottle trap or offset trap to maintain the clearance.
Turning radius: A 1500 mm clear turning circle for a wheelchair affects fixture placement and may require relocating the toilet or vanity to achieve the required clear floor space.
NZ Building Code Clause D1 (access routes) and the NZ Standards for accessible design (NZS 4121) provide the dimensional requirements for accessible bathrooms. If you are designing for a specific user, an occupational therapist assessment before the layout is locked can prevent costly changes later.
What on-site experience actually teaches you about plumbing layouts
Most bathroom renovation problems are not discovered during design. They show up on day one of strip-out, when the wall comes off and the actual pipe positions bear no resemblance to what anyone expected.
The most consistent pattern across completed renovations is this: homeowners who lock their fixture positions early and resist the urge to move the toilet save a significant amount compared to those who decide mid-project that the toilet “would look better on the other wall.” Moving a toilet is rarely just a plumbing cost. It triggers new framing, additional waterproofing area, possible consent amendments and a longer programme.
Two outcomes from completed projects illustrate this clearly. In one Auckland bathroom renovation, the client kept all three fixtures in their original positions, updated the tapware and replaced the vanity. The plumbing rough-in took one day. In a second project, the client relocated the toilet and shower to opposite walls after framing had started. The result was a three-day rough-in, additional consent documentation and a programme extension of two weeks.
The other consistent finding: a pre-start plumbing check is never wasted money. On several projects, that check revealed inadequate fall on the existing waste line, which would have caused slow drains from day one of the new bathroom’s life. Catching it before waterproofing meant the fix cost a fraction of what it would have after tiles were on.
The practical advice is straightforward. Make your plumbing decisions first. Choose your fixtures, confirm their setouts, and hand a dimensioned plan to your plumber before anyone picks up a demolition bar.
Sortedhomesolutions handles your bathroom plumbing from plan to fit-off
Planning a bathroom plumbing layout correctly takes time, trade knowledge and careful sequencing. Sortedhomesolutions manages the entire process for Auckland homeowners under one fixed-fee contract, from the initial pre-start plumbing check through rough-in, consent, waterproofing and fit-off.
Every Sortedhomesolutions bathroom renovation includes a licensed plumber coordinated with the tiler, waterproofer and electrician, so nothing is sequenced out of order. Fixed-fee pricing means you know the cost before work starts, with no surprises when the wall comes off. The team handles building consent applications and inspection bookings, so you have one point of contact for the whole project.
View fixed-fee bathroom renovation pricing or browse the completed bathroom gallery to see finished projects. To get a fixed quote for your bathroom, contact Sortedhomesolutions directly through the website.
Sources
Recommended
Comments