

Consent First Villa Renovation NZ: Avoid Council Delays, Budget 10–20%


Yes, you can renovate a villa in New Zealand, and most work is achievable once you understand where consent, heritage rules, and structural condition intersect. The single highest-priority first step is booking a pre-application meeting or Project Information Memorandum (PIM) with your local council before you commit to design work. This early check, alongside guidance from Building Performance, BRANZ, and full-service renovation teams, tells you what your villa actually needs before you spend a dollar on drawings.
TL;DR:
Most villa renovations in New Zealand require a building consent unless the work is minor like small-scale cladding replacement, but extensive modifications often do not qualify for exemption.
Booking a pre-application meeting or Project Information Memorandum before starting design work helps identify heritage constraints and site issues that could delay or complicate the project.
Costs vary significantly based on structural condition, heritage requirements, site access, and concealed damage, with a recommended contingency of 10 to 20 percent for unknown issues.
Common structural problems include deteriorated piles, moisture damage, and borer activity, all of which require timely repiling and moisture remediation before finishing work.
Hiring a specialized team with villa experience, verifying licenses, and having a project manager reduces coordination chaos and keeps the project on schedule.
Table of Contents
Villa renovation guide NZ: planning and consent basics
Most villa renovation work in New Zealand needs a building consent. Some jobs are exempt, but the threshold is narrower than many homeowners assume. Replacing like-for-like cladding on a small area might be exempt; moving a load-bearing wall, adding a bathroom, or altering the roofline almost never is. The Can I Build It? tool walks through Schedule 1 exemptions and gives a straight answer for common projects, which beats guessing and getting a stop-work notice halfway through demolition.
A PIM and pre-application meeting are worth booking even when you’re fairly confident about scope. Councils use these sessions to flag site-specific issues early, whether that’s a heritage overlay, a flood-prone section, or an existing consent that was never signed off. The official consent guidance sets out the full lifecycle: pre-application discussion, lodging documents, scheduled inspections during construction, and the Code Compliance Certificate (CCC) once everything checks out. Skipping the pre-application step is one of the most common reasons villa projects blow their timeline.
Heritage overlays add another layer, particularly in Auckland’s Special Character Areas. Councils typically focus scrutiny on what’s visible from the street: verandahs, roof pitch, weatherboard profiles, chimneys, and front joinery. Rear additions and interior changes generally face fewer restrictions, though they still go through the same resource consent review if they touch a protected element.
Once consent is granted, three things keep a project on track:
Book inspections as soon as each stage is ready, not after you’ve moved on to the next trade.
Keep every Licensed Building Practitioner (LBP) record and producer statement in one folder from day one.
Confirm CCC timelines with your council upfront. Delays here often trace back to missing LBP paperwork, not the physical build.
If you’re unsure whether a specific job needs sign-off, our building consent exemptions guide breaks down the grey areas, and our CCC guide covers what happens after the final inspection.
What does a villa renovation cost in NZ?
Cost is the question every villa owner actually wants answered, and the honest response is: it depends heavily on condition, access, and how much heritage compliance applies to your specific site. Independent New Zealand pricing data gives a useful starting benchmark rather than a fixed quote.
Cost benchmark: According to the NZ renovation and building cost index, typical renovation ranges vary widely by project type and scope, and a villa’s age and condition can push costs well outside a generic estimate. Treat published ranges as a planning tool, not a ceiling or floor for your project.
A few cost drivers matter more for villas than for newer homes:
Repiling and foundation work adds significant cost when piles have deteriorated, particularly on sites with poor subfloor drainage or a history of moisture damage.
Heritage-matching materials, like custom weatherboard profiles or replica joinery, cost more than standard modern equivalents because they’re often made to order.
Access and site condition affect labour time disproportionately. Narrow driveways, mature trees, and tight urban sections all slow trades down.
Concealed damage discovered once walls or floors open up, especially borer and rot, is the single biggest reason villa budgets move after the quote stage.
Build contingency into your budget from the outset rather than treating it as a fallback. A common rule of thumb among renovators is to hold back 10 to 20 percent of your total budget for unknowns, higher toward 20 percent if your villa hasn’t had structural work done in the past few decades. Staging your spend, tackling structural and weatherproofing work first, then cosmetic finishing, also protects you from running out of money mid-project.
For a figure specific to your property, a quantity surveyor (QS) or an experienced renovation team can walk the site and price against actual condition rather than an average. That’s the gap between a national index and a number you can actually build a budget around.
What structural problems are common in NZ villas?
Villas built in the 1900s to 1930s share a predictable set of weak points, and knowing what to look for before you buy or before you start design saves you from nasty surprises during construction. BRANZ’s technical guide documents these issues in detail because they recur across almost every unrenovated villa in the country.
Watch for these warning signs during a walkthrough:
Soft or spongy timber around window sills, base plates, and bathroom floors, usually a sign of moisture damage or active rot.
Sagging or bouncy floors, which often point to deteriorated piles or joists rather than a cosmetic levelling issue.
Damp, musty subfloor smell, indicating poor ventilation or drainage beneath the house.
Small exit holes in exposed timber, the classic sign of borer activity, particularly in untreated rimu framing.
Cracked or leaning brick chimneys, common where the original foundations have moved over decades.
Repiling is one of the most frequent structural jobs on a villa renovation list. If piles have sunk, rotted, or were never adequate for the soil type, replacement piles restore level and stability before any other work proceeds. Sequencing matters here: repiling generally needs to happen before floor levelling, wall straightening, or new joinery installation, otherwise you’re finishing work on top of a foundation that’s still moving.
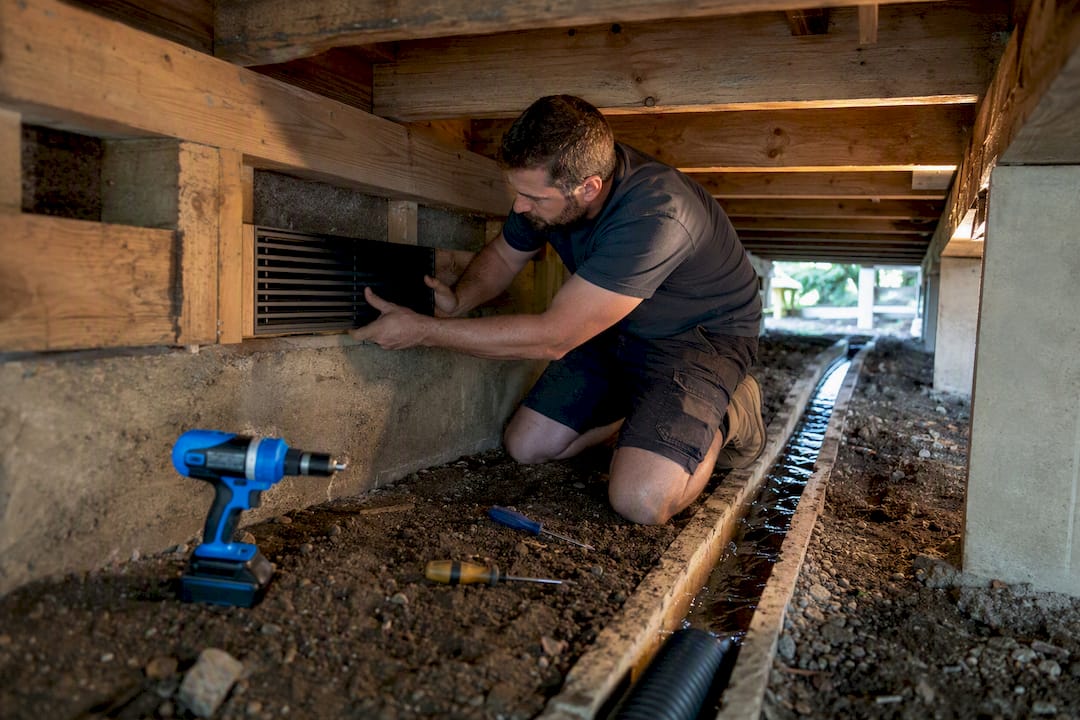
Subfloor ventilation and drainage fixes often go hand in hand with repiling. Adding vents, improving ground clearance, or redirecting stormwater away from the foundation addresses the root cause of the moisture that caused the damage in the first place, rather than just patching the timber.
Pro Tip: If your villa’s wiring or plumbing hasn’t been touched since the original build, budget for rewiring and re-piping alongside structural work. Opening up walls for repiles is the cheapest window you’ll get to run new services before everything’s closed up again.
How do you keep a villa’s character during renovation?
Councils in heritage and Special Character Areas focus their attention on what passers-by can see: the verandah, roofline, chimney, and front-facing joinery. Interiors and rear extensions typically get more design freedom, which is why so many successful villa renovations put the modern open-plan kitchen and living space at the back and keep the street-facing rooms close to original.
Getting the front right usually comes down to a handful of decisions, including care for plantation shutters, which can be applicable when discussing heritage-appropriate window treatments:
Weatherboards: matching the original profile and width matters more to councils than the material itself; modern fibre cement boards milled to the original profile are often acceptable.
Joinery: double-hung timber windows with the original glazing bars and proportions are the detail that reads as “villa” from the street, even when the glass behind them is now double glazed.
Verandah brackets and fretwork: these decorative details are cheap to replicate accurately and expensive to get wrong, so match them precisely rather than approximating.
Roof pitch and chimney silhouette: changing these typically triggers the closest scrutiny, so keep alterations here to a minimum on visible elevations.
A rear addition with full-height glazing, a flat or low-pitch roof, and contemporary cladding often sits comfortably next to an untouched villa frontage, because the contrast is intentional rather than a mismatch. That’s the practical compromise most Auckland villa renovations land on: heritage-accurate front, contemporary rear.
Which insulation and heating upgrades suit a villa?
Villas were built before insulation was standard, which means most of the comfort gains available to you are large and immediate. Ceiling insulation is usually the easiest win, since most villa roof cavities have enough clearance for standard batts without structural changes. Underfloor insulation follows a similar logic, and it pairs naturally with any repiling or subfloor ventilation work already underway.
Wall insulation is trickier because villa wall cavities are often narrow or absent behind original tongue-and-groove lining, so retrofitting sometimes means removing internal linings to install insulation properly rather than blowing it in.
On glazing, you don’t have to choose between heritage joinery and thermal performance. Original timber sashes can be retrofitted with double-glazed units in many cases, or replaced with replica joinery milled to match the original proportions but built for modern glazing standards. Either approach keeps the street-facing character intact while cutting heat loss substantially.
For heating and ventilation:
A heat pump sized to the main living areas handles day-to-day comfort more efficiently than multiple plug-in heaters.
Extraction fans in bathrooms and the kitchen reduce the moisture load that older villas struggle to shed naturally.
A ducted or in-line ventilation system helps circulate air through a villa’s often compartmentalised room layout.
Any upgrade that touches wiring, plumbing, or structural elements of the building envelope needs to go through the same consent check as other structural work, so raise it during your PIM rather than after work has started.
Who should you hire to renovate a villa in NZ?
A villa renovation typically needs more coordination than a standard reno because of the consent complexity and the specialist trades involved. Depending on scope, your team might include an architect or designer for layout and heritage-sensitive detailing, a structural engineer for repiling and foundation assessments, Licensed Building Practitioners for consented work, a main builder to run the site, and specialist joiners if you’re replicating original window or door profiles.
Before signing anyone, check:
LBP licence status for every trade doing restricted building work, verifiable through the LBP register.
Current insurance, including public liability and, where relevant, contract works cover.
References from a completed villa project, not just general renovation experience, since villa-specific problems catch out generalist teams.
A clear payment schedule tied to project milestones, not a lump sum upfront.
Get everything in writing, including how variations are priced and approved once the walls open up and something unexpected turns up. Our guide to choosing a renovation company covers the specific questions to ask before you sign.
Pro Tip: Ask any prospective builder how many villa-specific projects they’ve completed in the last two years, not just how long they’ve been in business. Villa problems are different enough from standard renovations that general experience doesn’t always transfer.
A project manager who coordinates trades, LBPs, and council interactions under one contract can reduce much of the coordination a homeowner would otherwise have to manage themselves.
What do real villa renovations in NZ look like?
Seeing how other owners handled the trade-offs makes the abstract numbers above easier to apply to your own project. NZ project galleries like Archipro’s villa renovation collection show a consistent pattern: heritage-matched fronts paired with contemporary rear extensions, which lines up with what councils tend to approve without friction.
A few patterns worth noting from typical villa projects:
Kitchen and living relocation to a rear addition is one of the most common single moves, freeing up the original front rooms as bedrooms or a study while putting the high-traffic space where extension rules are more relaxed.
Repiling combined with a full bathroom rebuild often happens together, since opening the subfloor for piles is the same window you need for new plumbing runs.
Verandah and joinery restoration done last, once structural and services work is complete, keeps the street-facing heritage elements protected from construction damage.
The consistent lesson across these projects is that budget and consent complexity scale with how much you touch the street-facing structure, not with square metreage alone. You can view more before-and-after examples on the Sortedhomesolutions gallery.
Your pre-build checklist for renovating a villa
Before you spend money on detailed drawings, work through this sequence:
Book a PIM or pre-application meeting with your council to flag heritage overlays and consent triggers early.
Get a site condition check from a builder or engineer, covering piles, subfloor moisture, and visible timber damage.
Set a preliminary budget using an independent cost index, then add a 10 to 20 percent contingency.
Shortlist two or three contractors with verified villa experience and LBP credentials.
Gather existing documentation: any prior consents, LBP records, and original plans if they exist.
Decide on a staging plan if budget or time is tight, prioritising structural and weatherproofing work first.
Having this paperwork ready when you approach a contractor for a quote speeds up the process considerably and avoids the back-and-forth that stalls projects before they’ve even started.
What surprises homeowners most about villa renovations
The gap between what a villa renovation looks like in a plan and what it actually involves usually comes down to two things: the subfloor, and the calendar. Owners consistently underestimate how much time repiling and moisture remediation add once a floor is opened up, and how often that discovery happens after the budget’s already been set.
The projects that stay on track aren’t the ones with the biggest contingency fund. They’re the ones where one person is coordinating the LBPs, the council inspections, and the trade sequencing, so nobody’s standing around waiting for someone else to finish. That coordination is worth more than most homeowners expect going in.
— Rudi
How Sortedhomesolutions manages your villa renovation
Coordinating a villa renovation yourself means juggling architects, structural engineers, multiple trades, and council paperwork, often while still living in the house. Some renovation companies run all of that under one contract, managing consent processes, LBP documentation, and sequencing between repiling, plumbing, and finishing trades, instead of requiring you to chase multiple contacts for updates.

Fixed-fee packages cover kitchen and bathroom renovations as well as full-house projects, so you know the number you’re working with before trades start on site. If you want a sense of scope and pricing before committing, our kitchen and bathroom pricing guide gives a starting point, and our full renovation page covers what’s included for whole-villa projects. The most useful next step is a site visit or initial chat through our inquiry page, where we can look at your villa’s specific condition and talk through what a realistic scope and budget looks like before you commit to a full quote.
Sources
For further reading beyond this guide, these official sources cover the technical and regulatory detail in depth:
FAQ
Do I need consent to renovate a villa in NZ?
Most structural, plumbing, and layout changes need a building consent, though some minor like-for-like repairs are exempt. Check the Can I Build It? tool for your specific job before assuming either way.
How much does a villa renovation cost in NZ?
Costs vary widely depending on condition, access, and heritage requirements, and the CheckMyBuilder cost index is a useful benchmarking starting point rather than a fixed quote. A site-specific estimate from a builder or quantity surveyor gives you a number you can actually plan around.
Can I change the front of a heritage-listed villa?
Street-facing changes to verandahs, rooflines, and front joinery face the closest council scrutiny in heritage overlays, while rear additions and interiors typically have more flexibility. Confirm specifics with your council during a pre-application meeting.
How long does villa repiling take?
Timeframes depend on the number of piles, site access, and whether moisture damage extends beyond the piles themselves, so there’s no single fixed duration. Sequencing repiling before floor and wall finishing work is standard practice regardless of timeline.
Should I hire a project manager for a villa renovation?
A full-service manager coordinating trades, LBP compliance, and council interactions reduces the administrative load significantly compared to managing each trade separately. Some renovation companies offer a single point of contact across the entire renovation.
Recommended
Comments